Landscape Painting Technique in Acrylic
In the process of painting this landscape an overall concept was going on at the back of my mind and through an analytical approach, I tried to paint layer wise to get a naturalistic output. The aim of this article is to provide a step by step demonstration of this landscape painting. While making my mind and heart to paint a landscape I was looking for some inspiration. So I was going through some landscape photographs (most of the time I paint the place I visited or my own photographs) and stumbled upon some photographs by Ricardo Gomez Angel. I became inspired to paint a landscape and started painting this. The composition of the painting was going on in my mind and I decided to paint it in Acrylic in three different layers – background, mid-ground and foreground. So I took a canvas board on my easel.
1. The Painting Surface
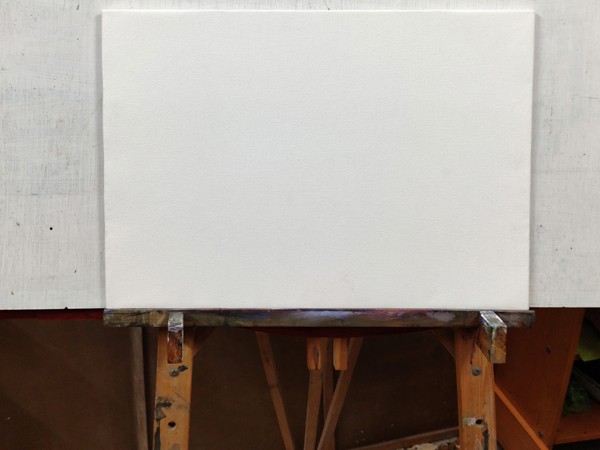
For this particular painting, I have chosen a 20″X14″ 10 Oz medium grain studio made canvas board which is acrylic primed.
2. Choosing The Palette
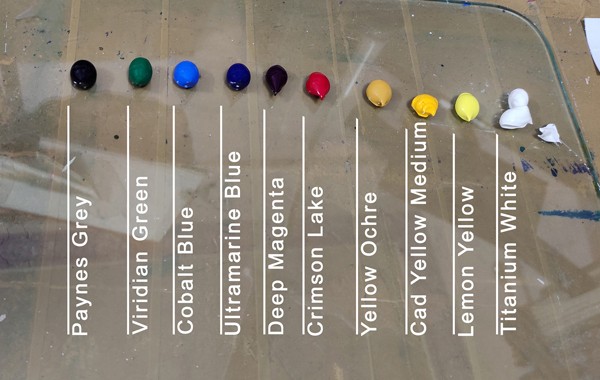
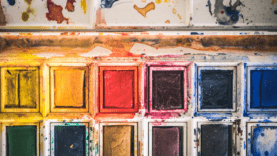
Fig 2: Here I am using this glass palette which contains eight colors, one grey and white. Here is the list of the colors:
Titanium White
Lemon Yellow
Cad Yellow Medium
Yellow Ochre
Crimson Lake
Deep Magenta
Ultramarine Blue
Cobalt Blue
Viridian Green
Paynes Grey
A palette at least should contain the primary colors i.e. red, yellow and blue. After mixing these primary colors you can get oranges, greens and violets as secondary colors. To save the mixing time we also can take these colors directly from the tube. Other than that we can have earthen tone, white and black or grey. Sometimes we choose two primary colors of the same hue according to the temperature of it like two blues, two yellows etc. If we see a special color in our subject that is covering a lot of areas then that color also can be included in the palette for that particular painting.
3. The Basic Block-in
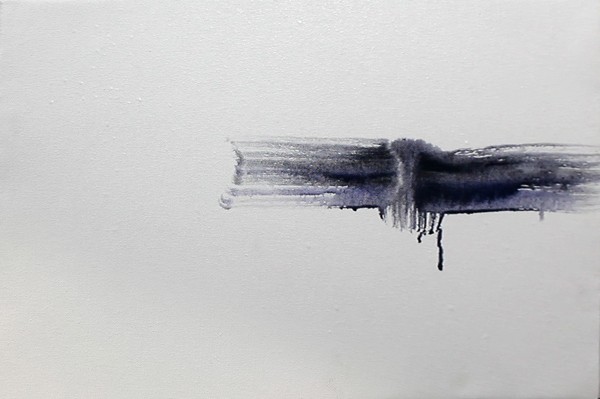
Fig 3: At the very beginning I am doing the block-in of the entire painting. For this, I have mixed Paynes Grey, Ultramarine Blue and a touch of Yellow Ochre.
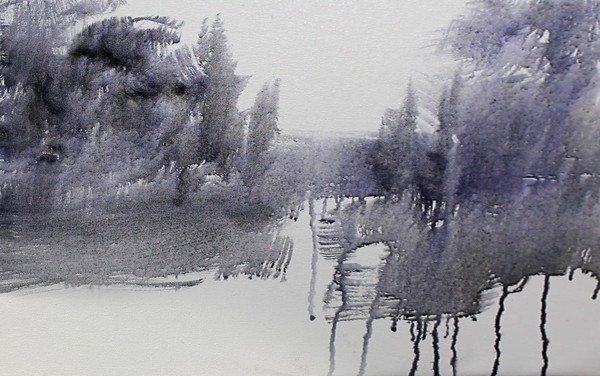
Fig 4: You can see I am getting a beautiful harmony of cool and warm grey. Here I am using a fan brush to get these different strokes.
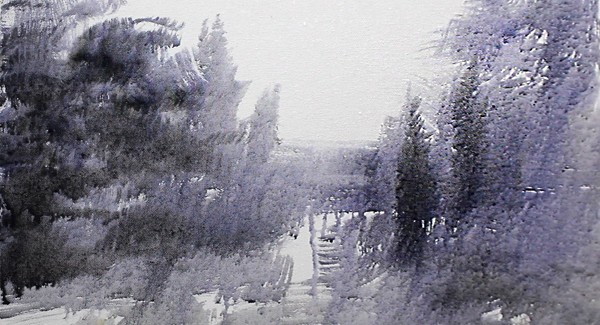
Fig 5: Here I am getting the sense of the entire composition which will help me to move further and to visualize the perspective.
4. Painting the Background
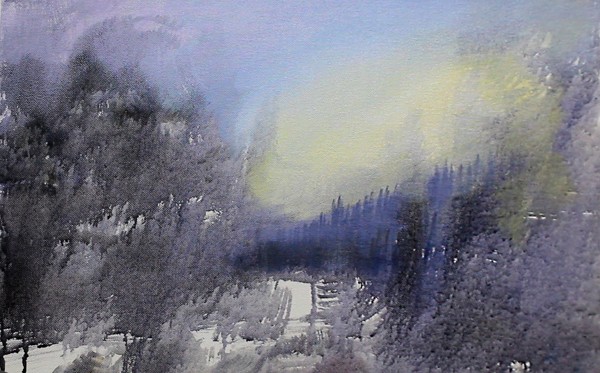
Fig 6: Now it’s time to establish the sky. I also have decided the light source and painted it with a mixture of cad yellow and white. Gradually it is blended with a mixture of ultramarine blue, cobalt blue and white. Towards the left, I have added a little bit of crimson to it. The entire process is done by a n°12 flat brush. Then I have added the suggestion of the distant trees. Here I have used a little darker version of the same sky color mixture. We need to remember that because it is far from the eyes there will be less contrast in values. In this area also I have laid down the brush strokes by a n°12 flat brush.
5. Painting the Mid-ground
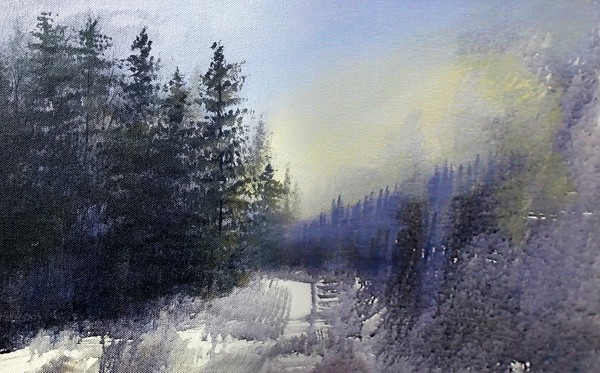
Fig 7: Now it’s time to block-in the mid-ground trees. This will be the darkest value of the trees. So, I have made a mixture of Paynes Grey, Ultramarine Blue, Yellow Ochre, and a touch of Viridian Green. A fan brush is used to create the random tree patterns.
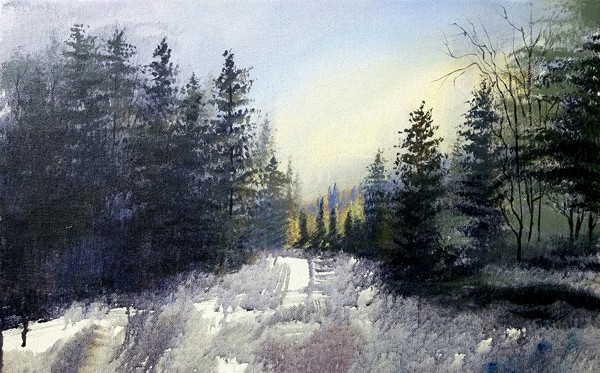
Fig 8: Here you can see that I have completed the block-in of the mid-ground trees on both sides and also established the suggestion of the backlight for the smaller trees in the background.
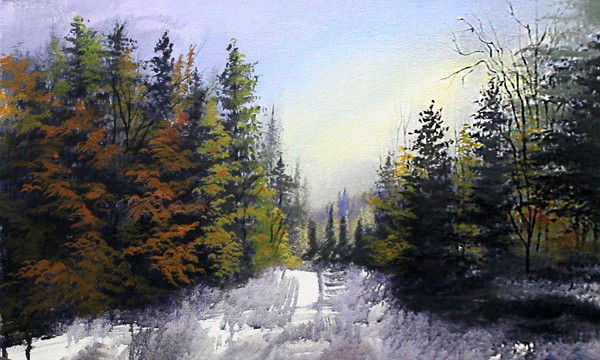
Fig 9: In this step, I have added a mid-tone to the trees. For the right-hand side tree group, light is coming from the back but for the left-hand side group, light is hitting the right edges of the trees. Accordingly, I have laid down the brush strokes. Here you can see a variation of medium value greens and oranges to create harmony. For this n°6 and n°10 filbert brushes are used.
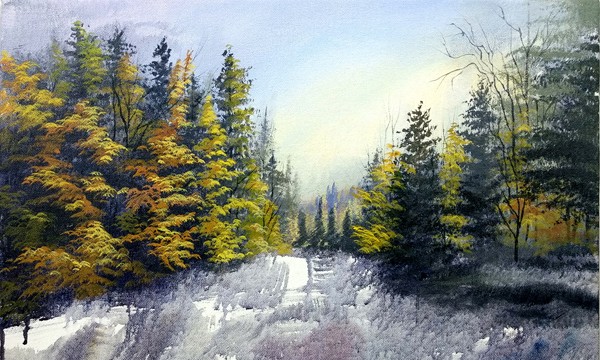
Fig 10: Thereafter in a similar way the highlight is added to the mid-ground trees. Here we have to remember not to cover the entire mid-tone but need to give the strokes here and there.
6. Painting the Foreground
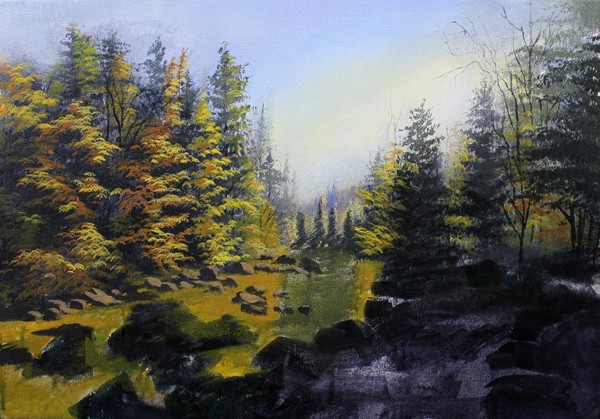
Fig 11: Now it’s time to do the block-in of the foreground stones and grasses. The goal is the placement of the objects. The brush strokes should be very spontaneous and quick to get natural formation of the stones. Also, I have blocked-in the midground stones by using only two values.
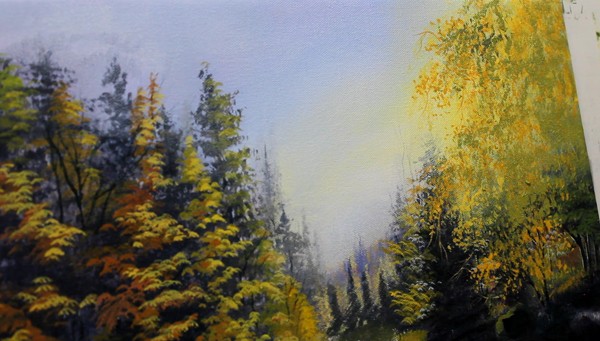
Fig 12: Now I am planning for a foreground tree. Against the bright sun, the behind leaves will appear bright in color because of the scattering of the light. So, I laid down some leaves pattern in three layers starting with Cad Yellow + White. Then Crimson and Yellow Ochre are added. In the 3rd layer, a little bit of Viridian is added to the mixture. A fan brush is used to create this pattern.
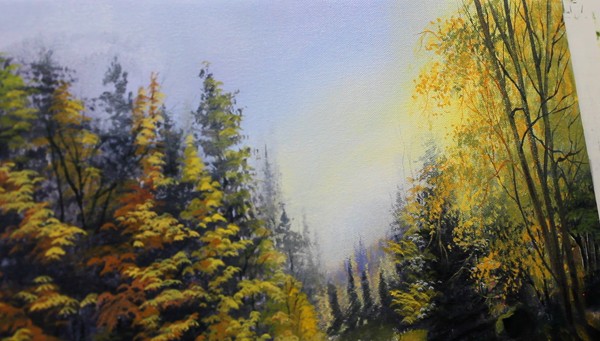
Fig 13: After creating the behind leaves I have drawn the stem and some branches of the tree by using round and rigger brushes. This is a solid shape against the bright sun. So, it will appear dark in value.
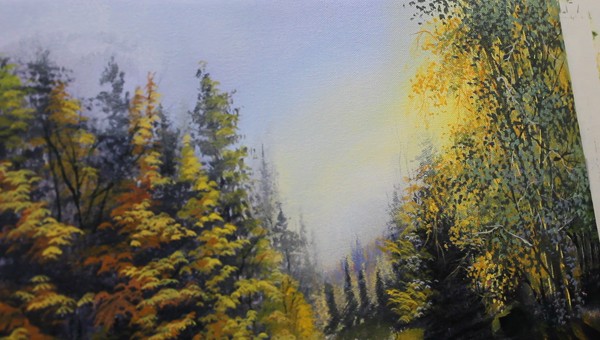
Fig 14: Now the foreground leaves are added by using a ribbon brush. Because it is against the light source leaves will appear darker. Also, I have added some green-grey leaves which are getting bounce light from the sky. Then I have given the suggestion of the rim light for the tree stem and the branches. The grey branches are getting bounce light from the sky.
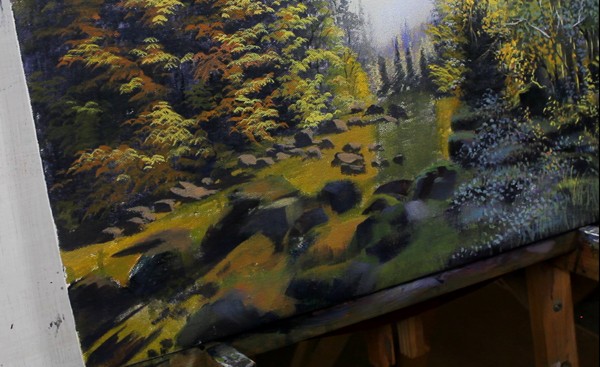
Fig 15: Now it’s time to concentrate on the foreground plane. I have added some small leaves pattern and grasses. The leaves are in shadow will have cool grey color and the leaves are in light rays will have a bright green color.
The foreground stones are also blocked-in with very quick and spontaneous brush strokes which separated individual stones from the entire mass of dark patches. For this, flat brush or filbert brushes can be used. Here I also have added the darkest dark in the stones to obtain more contrast.
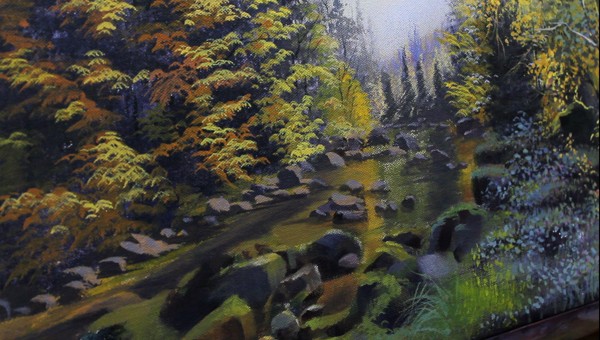
Fig 16: Now the mid-value has been added to the foreground stones by a n°6 filbert brush. Here you can see that the stones are gradually getting their volume. Similarly for the smaller stones also I have added mid-value with blue-grey and worm-grey colors which will create harmony.
7. Adding Reflection on the Water Surface
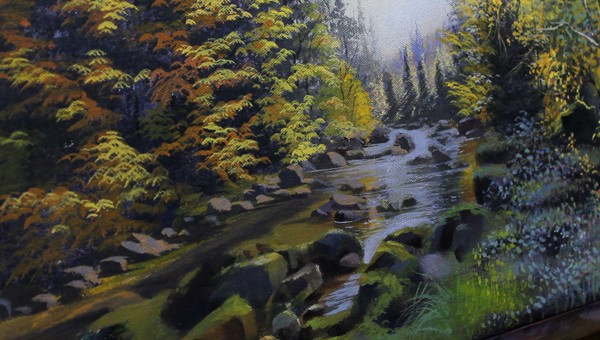
Fig 17: Then I have added the sky reflection on the water with a n°2 flat brush. With the strokes only I tried to give the suggestion of the water ripples. We should take care of the horizontal brush stroke direction to create a correct perspective.
8. Adding detailing
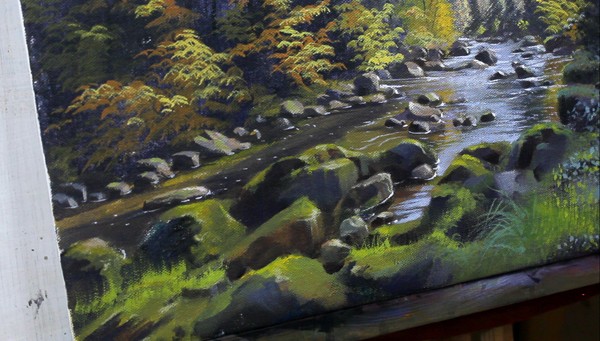
Fig 18: In this step, the highlight has been added to the stones. For this, I have used a n°6 narrow tip round brush. On the stones, I have given the suggestion of the sun rays which are coming from the back at a certain angle. The light rays and the moss on the stone together are creating a bright green color. We have to remember not to overdo it. This is the time to add the highlight to the water. I have given the suggestion here and there and also have added the direction of the water flow. For this titanium white and a liner brush is used.
9. Painting the Sunrays
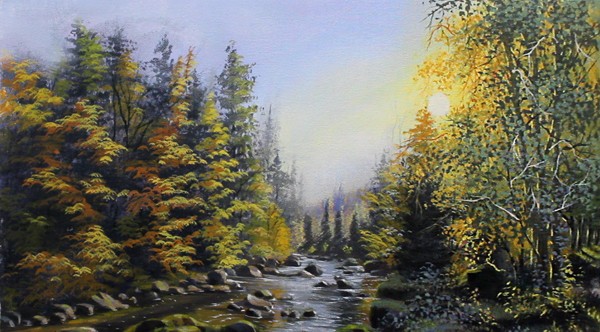
Fig 19: Now let’s add the light source. We can start with a round bristle brush to add a bright circular shape of the sun by using titanium white.
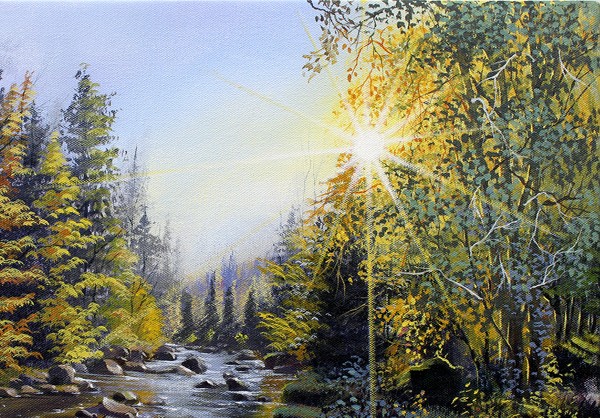
Fig 20: Here I have added the light rays by using a wooden scale in two layers; first with titanium white then added a little bit cad yellow. Now the foreground lighting will look convincing because of the rays.
10. Final Painting

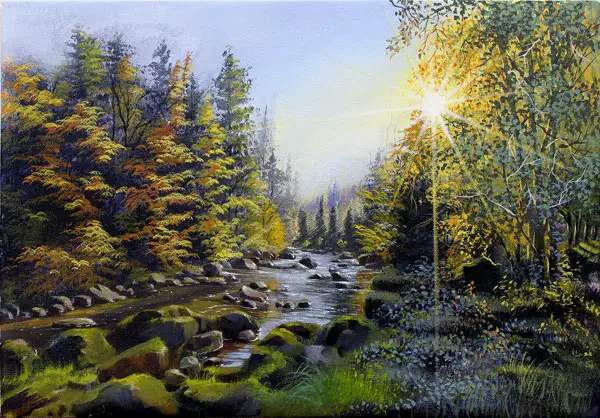
Fig 21: And here is our final painting.
The above landscape painting was a beautiful journey towards the light where I started with the dark but finally reached the brightest light. It is just one way to do it among many other ways. The most important thing is to keep the inspiration alive.
For a video tutorial of this painting with narration, you can visit this link:
https://youtu.be/FEibqr7g7RM
by Raj Maji (Artist)
Fine Art Diary channel


